More AI models
Read more

How to Install a Car Lift at Home Step-by-Step for DIY Enthusiasts

Many car owners want to work on their vehicles at home, but it can be hard to reach everything with just a jack and stands. A car lift can make car repairs and maintenance easier while also saving space in the garage.
Installing a car lift at home is possible with the right preparation, tools, and planning.
Safety and proper setup are important for anyone adding a lift to their garage. There are different styles of car lifts, such as two-post and four-post, each with their own requirements for space and installation.
Checking your concrete floor and following step-by-step directions is key for a solid and safe lift, as explained in this step-by-step guide. Anyone thinking about installing a car lift should also know about long-term maintenance and the necessary safety checks before using the lift.
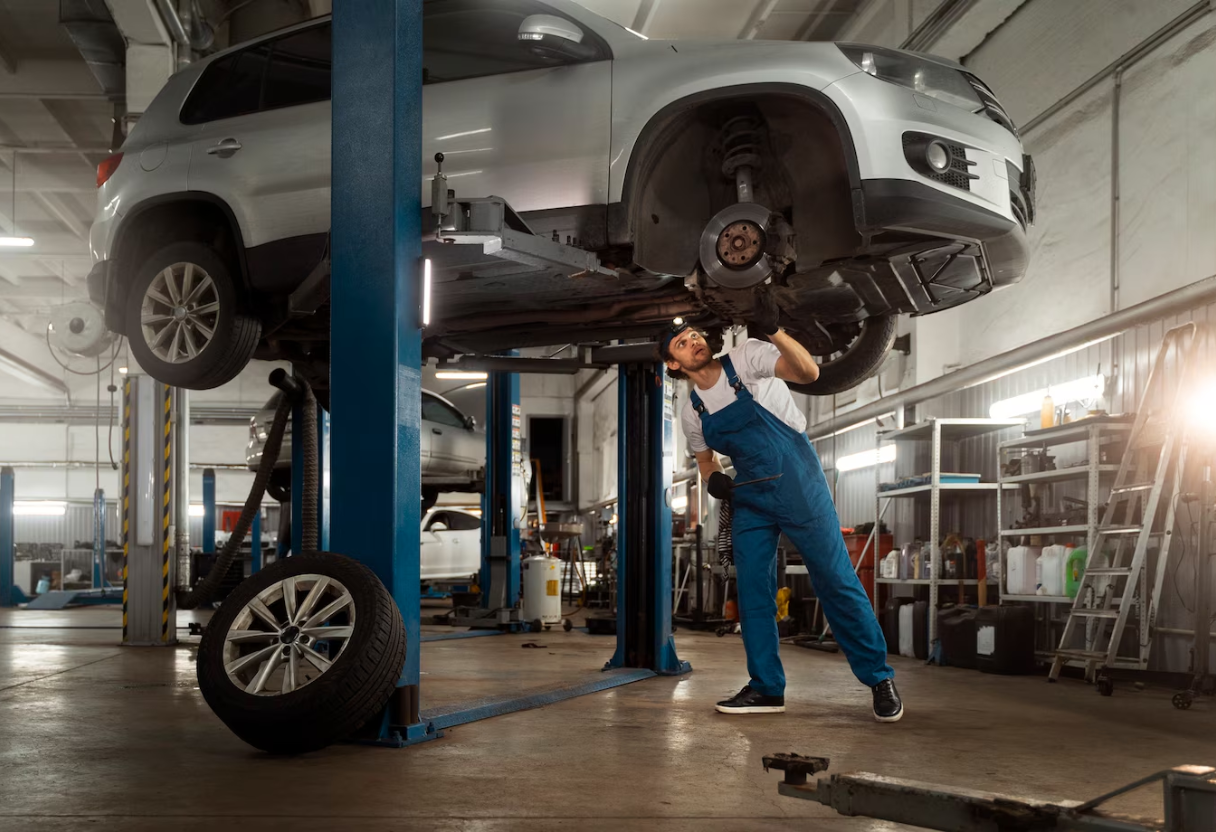
Car lifts make it easier to work on cars at home, giving better access to the underside and saving space. The main options include two-post, four-post, and scissor lifts, each with their own specific advantages and uses.
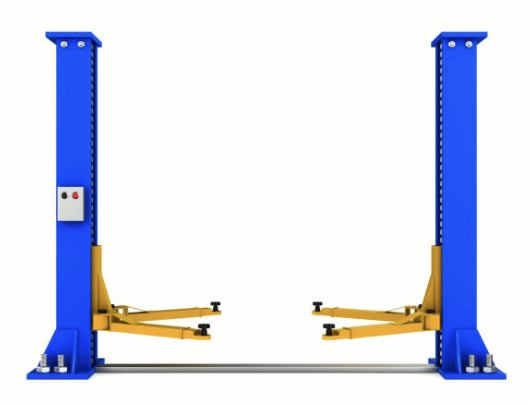
A two-post lift uses two strong vertical posts with arms that slide under the car. They take up less floor space, which helps in smaller garages.
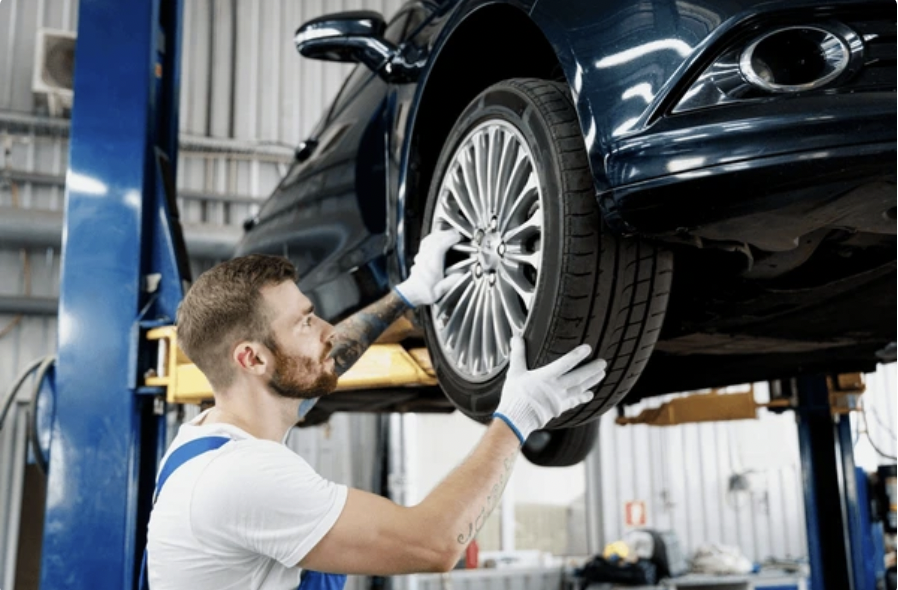
These car lifts hold the vehicle by the frame, leaving the wheels hanging free. This setup is good for tire, brake, and suspension work.
Most two-post lifts need a higher ceiling—usually at least 11 to 13 feet—to safely raise a car. The lift's open design makes it easier to reach all parts of the vehicle.
However, they require careful installation and anchoring to a solid concrete floor. Learn more about two-post lifts in home garages.
Four-post lifts have four tall columns and ramps that let the car drive onto a platform. They spread the weight of the car across more points for extra stability.
This makes them suitable for both maintenance and long-term vehicle storage. These lifts fit more easily in garages with lower ceilings—some models require only about 8 feet.
Wheel contact lets people store one car above another or use the lift for oil changes or tire rotations. Four-post lifts are also easier to set up and move than two-post lifts.
See a guide to four-post home garage lifts.
Scissor lifts have a platform that rises straight up, powered by a folding mechanism under the car. This lift style is compact and doesn’t take up much room when not in use.
Some versions need as little as 4 inches of clearance above the car. These car lifts work well for quick maintenance tasks, like changing oil, brakes, or working on the exhaust.
Scissor lifts are easy to move around, making them a good fit for tight home garage spaces. However, they usually do not lift as high as two-post or four-post lifts.
They are best for users who want a simple, portable solution rather than constant, heavy-duty repairs. For more on scissor lift options, visit this scissor lift overview for garages.
Careful planning helps avoid problems during installation. Key details include measurements, checking weight limits, and making sure the garage floor is strong enough.
A car lift needs enough room in the garage to fit both the lift and the vehicle. For most two-post lifts, the minimum ceiling height is usually 10 to 12 feet.
This allows enough cleaTools, Equipment, and Safety Guidelinesrance to raise most cars or pickups without hitting the ceiling. If the ceiling is too low, the lift may not work as intended.
Floor space is just as important. The area must allow for the length and width of the lift plus some extra room around the sides for working and walking.
Always leave enough space so doors and panels can be fully opened. For a standard lift, the recommended floor space is about 12 feet wide by 24 feet deep, but this may vary for different models.
A helpful tip is to use painter’s tape to mark the lift’s footprint on the garage floor. This allows the installer to check if there’s room for opening car doors and for moving around safely.
For more step-by-step instructions, visit this detailed guide on selecting the right location and space.
Every car lift has a specific weight limit, called lift capacity, which it cannot exceed. Before buying a lift, check the weight of the heaviest vehicle you plan to raise.
It is best to choose a lift with a higher capacity than your vehicle’s weight for added safety. For example, a 10,000-pound lift can handle most passenger vehicles and light trucks.
If there is any plan to lift larger trucks, vans, or SUVs, select a lift with enough capacity to do the job safely. Refer to the manufacturer’s manual for exact ratings.
Overloading a lift is unsafe and can damage both the lift and the vehicle. Double-check these numbers before finalizing the purchase.
Below is a short reference table:
Vehicle TypeTypical Weight RangeRecommended Lift CapacityCompact cars2,500 – 3,500 lbs7,000 lbs or moreFull-size trucks5,000 – 7,000 lbs10,000 lbs or moreSUVs and vans4,500 – 6,500 lbs9,000 lbs or more
A strong concrete floor is required to anchor a car lift. Most lifts need a slab that is at least 4 inches thick and rated for 3,000 psi compressive strength.
It is important to check for cracks, seams, or uneven surfaces, as these can weaken the anchor points. If the concrete slab is too thin or cracked, it may not be safe to install a lift.
Expanding anchor bolts require a solid foundation with no weak spots. To test a garage floor, use a drill to check the depth and a tape measure to confirm thickness.
Many experts suggest hiring a professional to evaluate the slab if there’s any doubt. For extra tips on concrete requirements and installation steps, review this DIY guide for car lift installation.
Proper tools, safety gear, and careful planning help make a car lift installation safer and more effective. Attention to equipment and personal protection is important when tackling this type of project at home.
A successful car lift installation requires a few key tools and heavy-duty equipment. At a minimum, they will need:
Stronger power tools may be required for thicker concrete floors. A stud finder, step ladder, and pliers can help with aligning columns and assembling smaller parts.
Car lift installation kits may come with specialized bolts, anchors, and safety lock parts. If not, users must purchase these separately.
Heavy items such as columns and arms are difficult to manage alone. At least one assistant is recommended, as noted by experts in car lift installation.
Staying safe during installation requires more than just good equipment. At all times, the installer and any assistants should wear:
Before starting, check that the workspace is free of clutter or spills. Keep any tools and parts organized to prevent trips and falls.
Always follow any manufacturer’s safety instructions, especially concerning the car lift’s safety mechanisms and built-in safety features. Confirm that all lifting tools, jacks, and hoists meet weight requirements for the job.
When raising parts into place, do not stand directly under suspended columns or car lift arms.
The workspace must be large and sturdy enough for safe operation. Most car lift installations require a flat concrete floor at least 4 inches thick for proper bolt anchoring.
Ceiling height should be a minimum of 12 feet for most models, though some designs allow for less. Clear the entire area of obstacles, including vehicles, tools, and any loose cords.
Mark the layout on the ground with chalk to guide placement. Double-check all measurements and confirm the lift’s arms will not contact walls or other equipment.
Power sources and cables should be tested for safety in advance. Make sure all safety features, such as mechanical locks or stops, are on hand and ready for setup.
Review instructions for the specific model before any installation work begins, as shown in various installation guides.
A car lift installation process requires careful positioning, secure anchoring, and correct connection of hydraulic systems. Proper attention to details like balancing cables and hydraulic lines ensures safety and reliable operation.
First, choose a flat and level concrete floor with enough ceiling height for the lift. Most two-post lifts require at least 12 feet of clearance from the floor to the ceiling for safe operation.
Mark the base plate positions with a tape measure, ensuring the columns are square and spaced according to the manufacturer's instructions. Anchor the columns by drilling holes using a hammer drill.
Heavy-duty anchors or bolts are needed to secure the base plates firmly into the concrete. Use a torque wrench to tighten anchors to the specified torque to avoid shifting during use.
Double-check both the vertical alignment and spacing before final tightening. Verify that the area around the lift remains clear so the vehicle doors and arms can move freely.
For more planning tips, see this step-by-step guide on car lift positioning.
Tip: Never install on cracked or uneven concrete, as this can compromise safety.
Next, set up the hydraulic systems and the power unit. Position the power unit close to one column, near an accessible electrical outlet.
Most home car lifts require a dedicated 220-volt power supply to operate safely. Mount the hydraulic reservoir and pump on the lift’s power unit bracket.
Connect the hydraulic hoses between the pump and lift cylinders as directed. Make sure fittings are tight to prevent leaks.
Pour the recommended type and amount of hydraulic fluid into the reservoir. Bleed the hydraulic system by running the lift up and down a few times with no load.
This removes air from the hoses and ensures smooth lift operation. Use a circuit breaker and proper wiring rated for the power unit's amperage needs for added protection.
Once the main hydraulic system is in place, balance the lift’s cables and hydraulic lines. Car lifts use strong steel cables to keep the arms synchronized as they raise and lower the vehicle.
Adjust cable tension using the threaded adjusters on each column, following the guidelines in your lift’s manual. Take care to route hydraulic lines to avoid kinks, pinches, or sharp bends.
Secure them with the provided clamps. Check again that all connections are tight and that cables do not rub against any moving parts.
After installation, test the lift by raising and lowering it while watching for uneven movement or slack cables.
Careful inspection and testing help prevent serious accidents and equipment damage. Focusing on every safety feature ensures a car lift operates smoothly and protects everyone in the garage.
Start by making sure all safety locks and mechanisms are working as designed. Check that the safety latches engage at each locking position by raising and lowering the lift several times.
It's important that these locks hold the lift securely, even if the main hydraulic or mechanical system fails. Next, inspect every safety mechanism such as arm restraints and slack cable safety devices.
Arm restraints should lock when the lift is raised, preventing unplanned movement. For 2-post lifts, look for cable slack indicators and verify that they engage if there's a problem with the cables.
Test the emergency stop feature as part of your initial checks. Make sure the lift will immediately stop when pressed.
Review the owner's manual to find all other built-in safety features and verify each one with a hands-on check. Look for warning decals and make sure they are clean and readable.
Clean out any debris or tools from around moving parts to avoid interference with safety-related components. Replace or repair anything that looks worn, loose, or damaged before moving on.
After checking the safety mechanisms, run the car lift empty first. Raise and lower the lift at least twice, listening for abnormal noises.
The movement should be smooth and consistent, with the lift stopping firmly at each lock point. Next, repeat the test with a vehicle loaded, making sure the weight is well within the rated capacity.
Watch the lift arms and posts for signs of shifting, bending, or unexpected movement. If the safety locks engage clearly and the car stays stable, the lift is likely functioning as intended.
Check all hydraulic or electric motors for leaks or overheating during the process. Inspect the power cables and controls for secure connections.
If any error lights come on or controls do not respond, stop using the lift until the issue is fixed. Document your findings in a maintenance log and plan to do these routine safety checks often.
For more information on verifying your car lift’s operation and keeping it safe, visit this step-by-step guide for home installs or see a detailed installation guide.
Proper maintenance extends the lifespan of a car lift and supports safe operation for all vehicle maintenance tasks. Paying attention to the condition of the lift, its hydraulic system, and safety features can help prevent accidents and expensive repairs.
Regular upkeep of a car lift includes checking for hydraulic fluid leaks and keeping the lift clean. Hydraulic cylinders should be inspected for leaks and topped up with the right fluid as needed, which is critical for smooth operation.
The lift’s arms, cables, and safety locks need to be checked for wear and rust. Tightening bolts and anchoring hardware prevents unwanted movement or shifting during use.
Cleaning tracks and removing debris from moving parts also help the lift work as designed. Lubricating pivot points, sliders, and other moving components should be done on a set schedule, like every few months.
Reviewing the lift’s manual ensures all maintenance steps match manufacturer guidelines. Accurate records of inspections and repairs help track long-term performance.
After installation, bleeding air from hydraulic cylinders is important to avoid uneven lifting and potential risks, as mentioned in some car lift maintenance instructions.
To keep vehicle maintenance safe, always confirm the car lift is in proper working condition before use. Only lift vehicles with the correct weight rating for the equipment, since overloading can strain the system and lead to failure.
Safety locks and mechanical stops should be engaged whenever the lift is raised. Never crawl under a vehicle unless these locks are fully in place.
Checking for unusual noises, slow lift speeds, or misalignment signals a problem that needs fixing. The garage area must be kept clear, and the lift’s arms positioned correctly on the vehicle chassis.
Following the safety steps found in detailed installation and maintenance guides prevents injuries and damage. Regular training on best practices helps everyone who uses the lift work more confidently and safely.
Installing a car lift at home requires careful planning, safe work practices, and specific technical standards. Homeowners should prepare for costs, evaluate professional installation options, and review requirements for safety and equipment.
Most car lifts require a concrete slab that is at least 4 inches thick. The slab should be poured with at least 3,000 psi concrete and reinforced with rebar or mesh.
Some manufacturers may have more specific requirements, so it is important to check the user manual or the manufacturer’s guidelines for your lift model. Safety depends directly on the quality and condition of the concrete.
For more information on slab requirements, visit the BendPak FAQ page about car lifts.
Start by checking the area is clear and that the slab meets requirements. Mark and drill holes for the anchors.
Assemble the posts and crosspieces as directed in the lift’s manual. Anchor the posts securely, then connect hydraulic lines and fill with recommended oil.
After carefully tightening all bolts and checking wiring, test the lift without a car. Make sure all safety locks and stops work before lifting a vehicle.
Detailed step-by-step instructions are available in many lift manuals and easy DIY guides for car lift installation.
Installing a car lift at home usually costs between $500 and $2,000 for the lift itself. Professional installation may add another $500–$1,500 depending on location and complexity.
Total costs may rise if the concrete needs to be reinforced or altered. For more on costs, see this overview of car lift installation in home garages.
Yes, most lift manufacturers and many local service companies offer professional installation. These services help ensure the lift is installed correctly and safely according to local code.
Scheduling installation with a professional is usually recommended for those unfamiliar with mechanical or electrical setups. To schedule an appointment or ask questions, you can contact suppliers such as American Custom Lifts.
Safety begins with the right slab specifications and anchoring. The work area should be free from clutter and have adequate lighting.
Regularly check all bolts, cables, and hydraulic parts. Protective gear, like gloves and safety glasses, should be worn.
Keep children and pets away from the work zone. Full safety checklists can be found in installation FAQs and guides.
A lift kit can be self-installed by someone with good mechanical skills and access to the required tools. A properly prepared concrete slab is also necessary.
The installer should follow all manufacturer instructions. Never improvise with anchors or electrical wiring.
Reading the full installation manual before starting is critical. For assistance, refer to easy-to-follow car lift installation guides.